In a previous post I installed the nose hinges each of which was supported by a splitter support rod manufactured by Fully Torqued Racing (FTR). The next step was to replace the splitter support rods that are located in front of the wheels. The stock locations interfere with the intercoolers’ heat exchangers and while the rods are OK, the clevises are subpar.
I took some measurements and placed an order on FTR’s website. After a month and a half of waiting I attempted to contact them to no avail. Their Facebook site indicates that they’ve left a lot of customers hanging which is shame because they make nice stuff. D’oh! Mismatched splitter support rods would be a disaster. LOL. Fortunately, during the nose hinge project I had swapped the clevises that connect to the nose frame with ones designed for a weld tab, so I had an extra pair of FTR’s sexy pressed-pin clevises left over. All I needed to do was to fabricate the rods.
I purchased 1/2” 6061 rod and cut it to length. I used the lathe to face the ends and drill and tap the holes, all basic lathe operations. The next challenge was to figure out how to machine flats on the rod to accept a 7/16” wrench. It’s trivial to clamp the rod in a vice and machine one flat, but how do I ensure that the second flat is parallel to the first one? I thought about machining something to index the first flat to ensure that it was rotated 180 degrees. Wait a second, rotation is the operative word. I have a rotary table and, although I’ve only mounted it flat (i.e., horizontally) to the milling table, it has a flange that enables it to be mounted vertically. To ensure that the flats are parallel I simply need to machine one flat, rotate the table 180 degrees and machine the second flat.

Rotary table mounted vertically to the milling table, the flat was just machined

Fully Torqued Racing makes high-quality stuff
FTR tapers their flats into the rod’s OD which looks nice and prevents stress risers. To replicate, I considered using a square mill to machine the flats and a ball mill to radius the edge. The challenge would be maintaining the depth of cut when changing tools. I’m sure that there is a procedure for doing this, but I found an easier solution. I purchased a 3/4" diameter, rounded-edge square end mill with a 1/8” corner-cut radius. Since the corner-cut radius is 4x the depth of the cut, a smooth taper is achieved. Since the cut depth is only 1/32” I could have easily created the flat in a single pass, but since I’m going for style points I took most of it off in the first pass and left 5 thousandths for the second pass.

Smooth taper with no stress risers
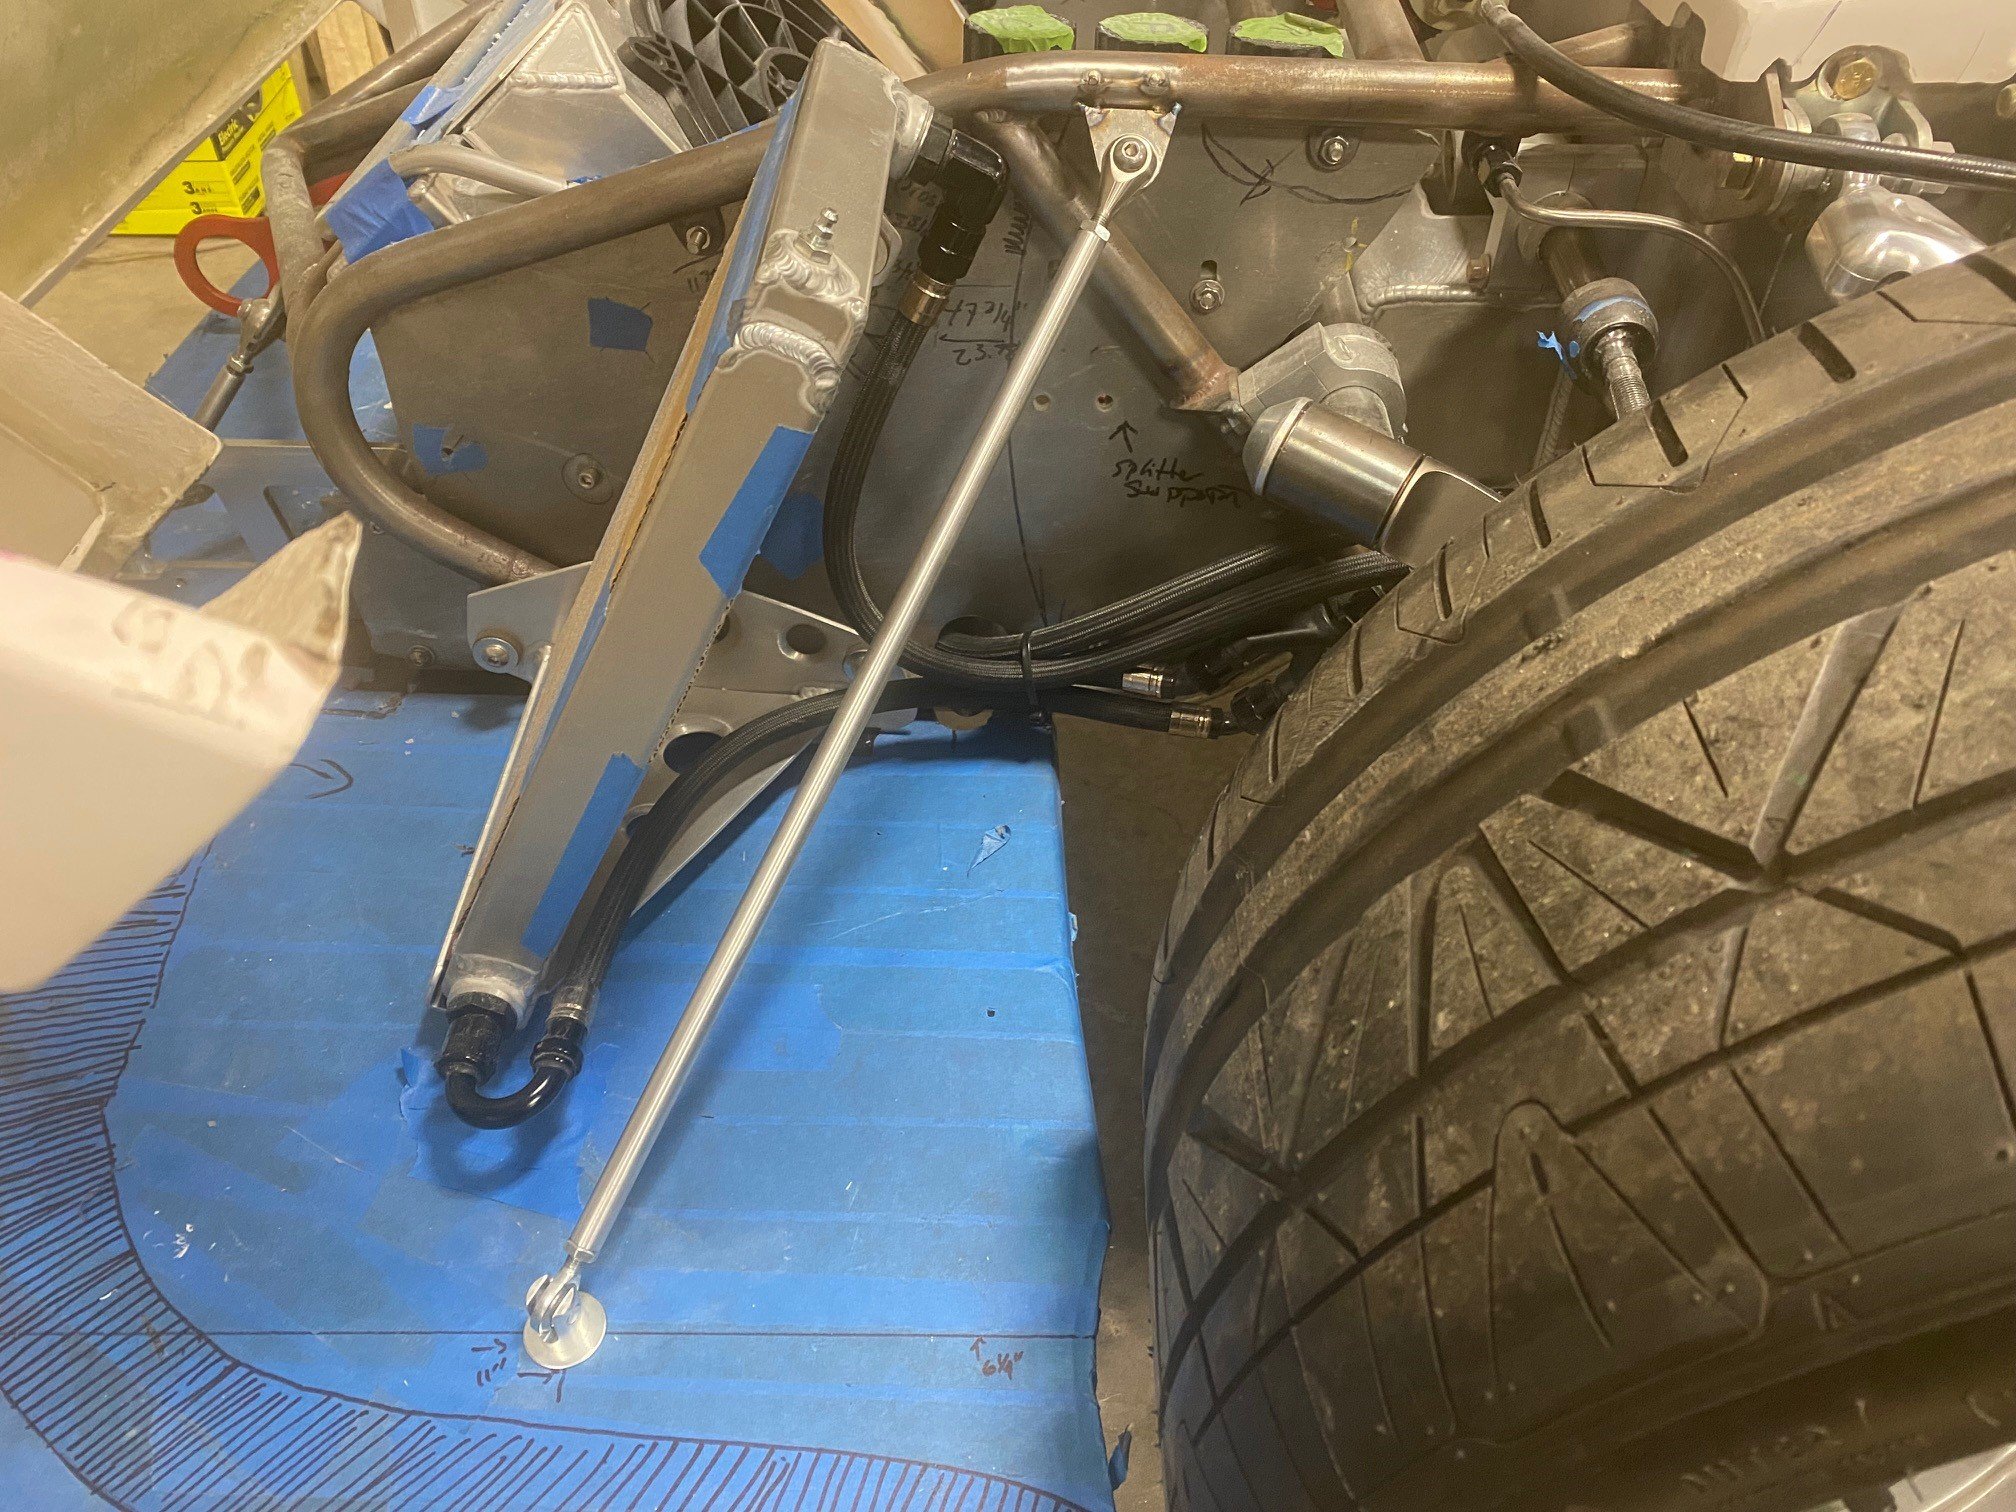
Fastening the top of the rod to the custom 4130 tube frame rather than the stock aluminum panel results in a stiffer splitter. The mounting tab was located as high as possible to maximize the support rod angle.

FTR’s pressed-pin clevis removes the need for a screw and nut which keeps things clean
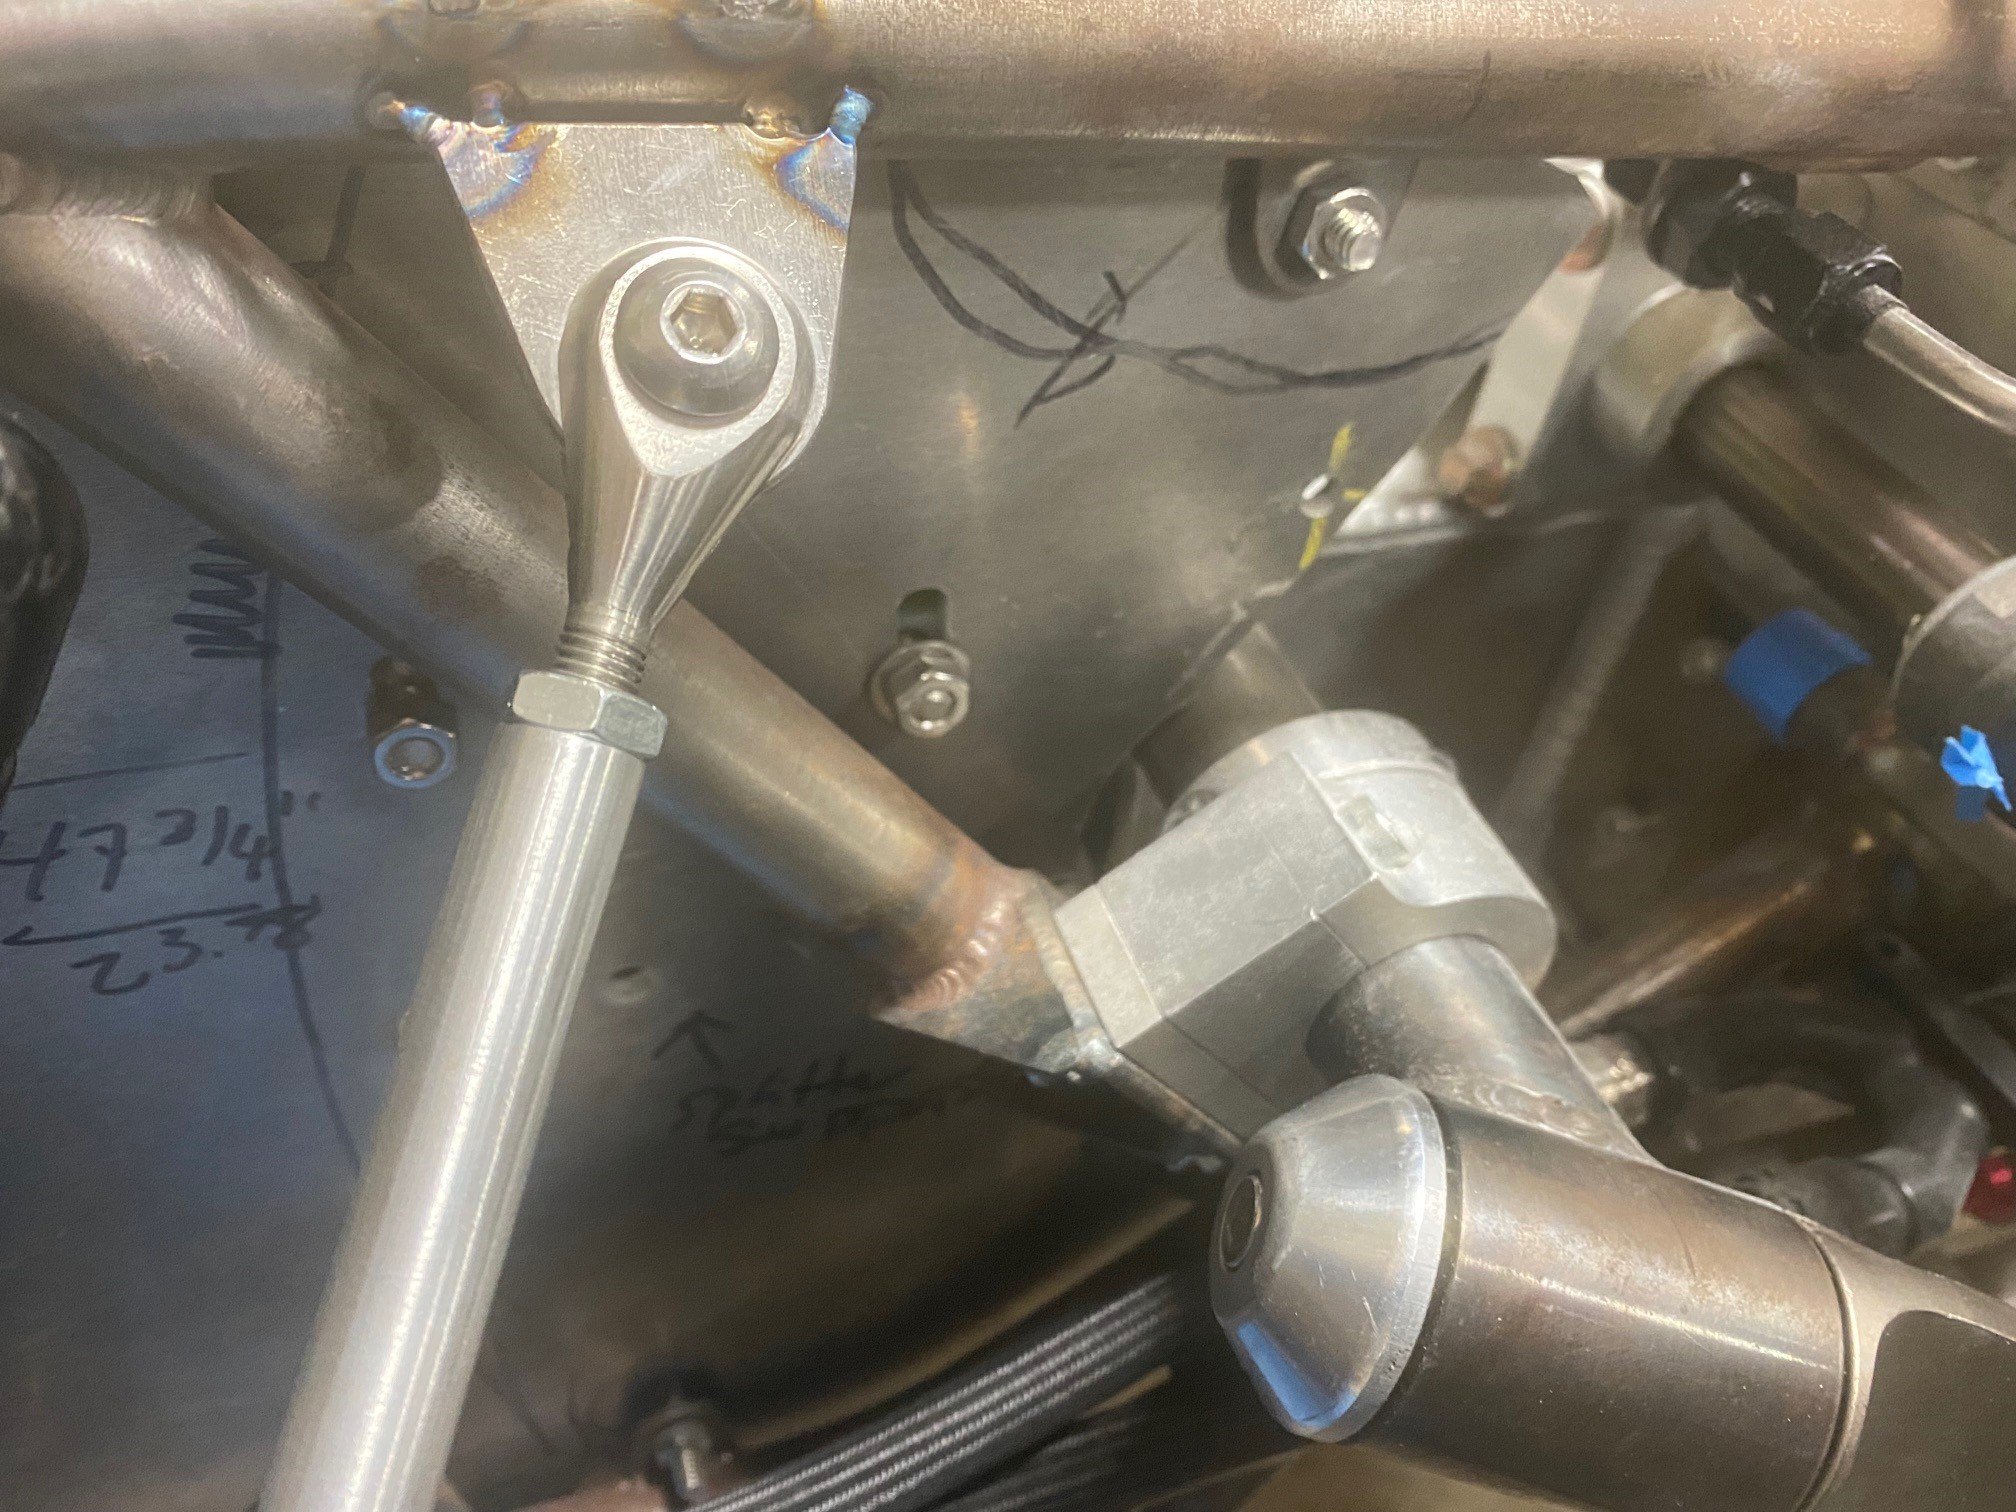
The tabs are tack welded because I may need to tweak their location when I finalize the wheel well liner and the brake duct tube.