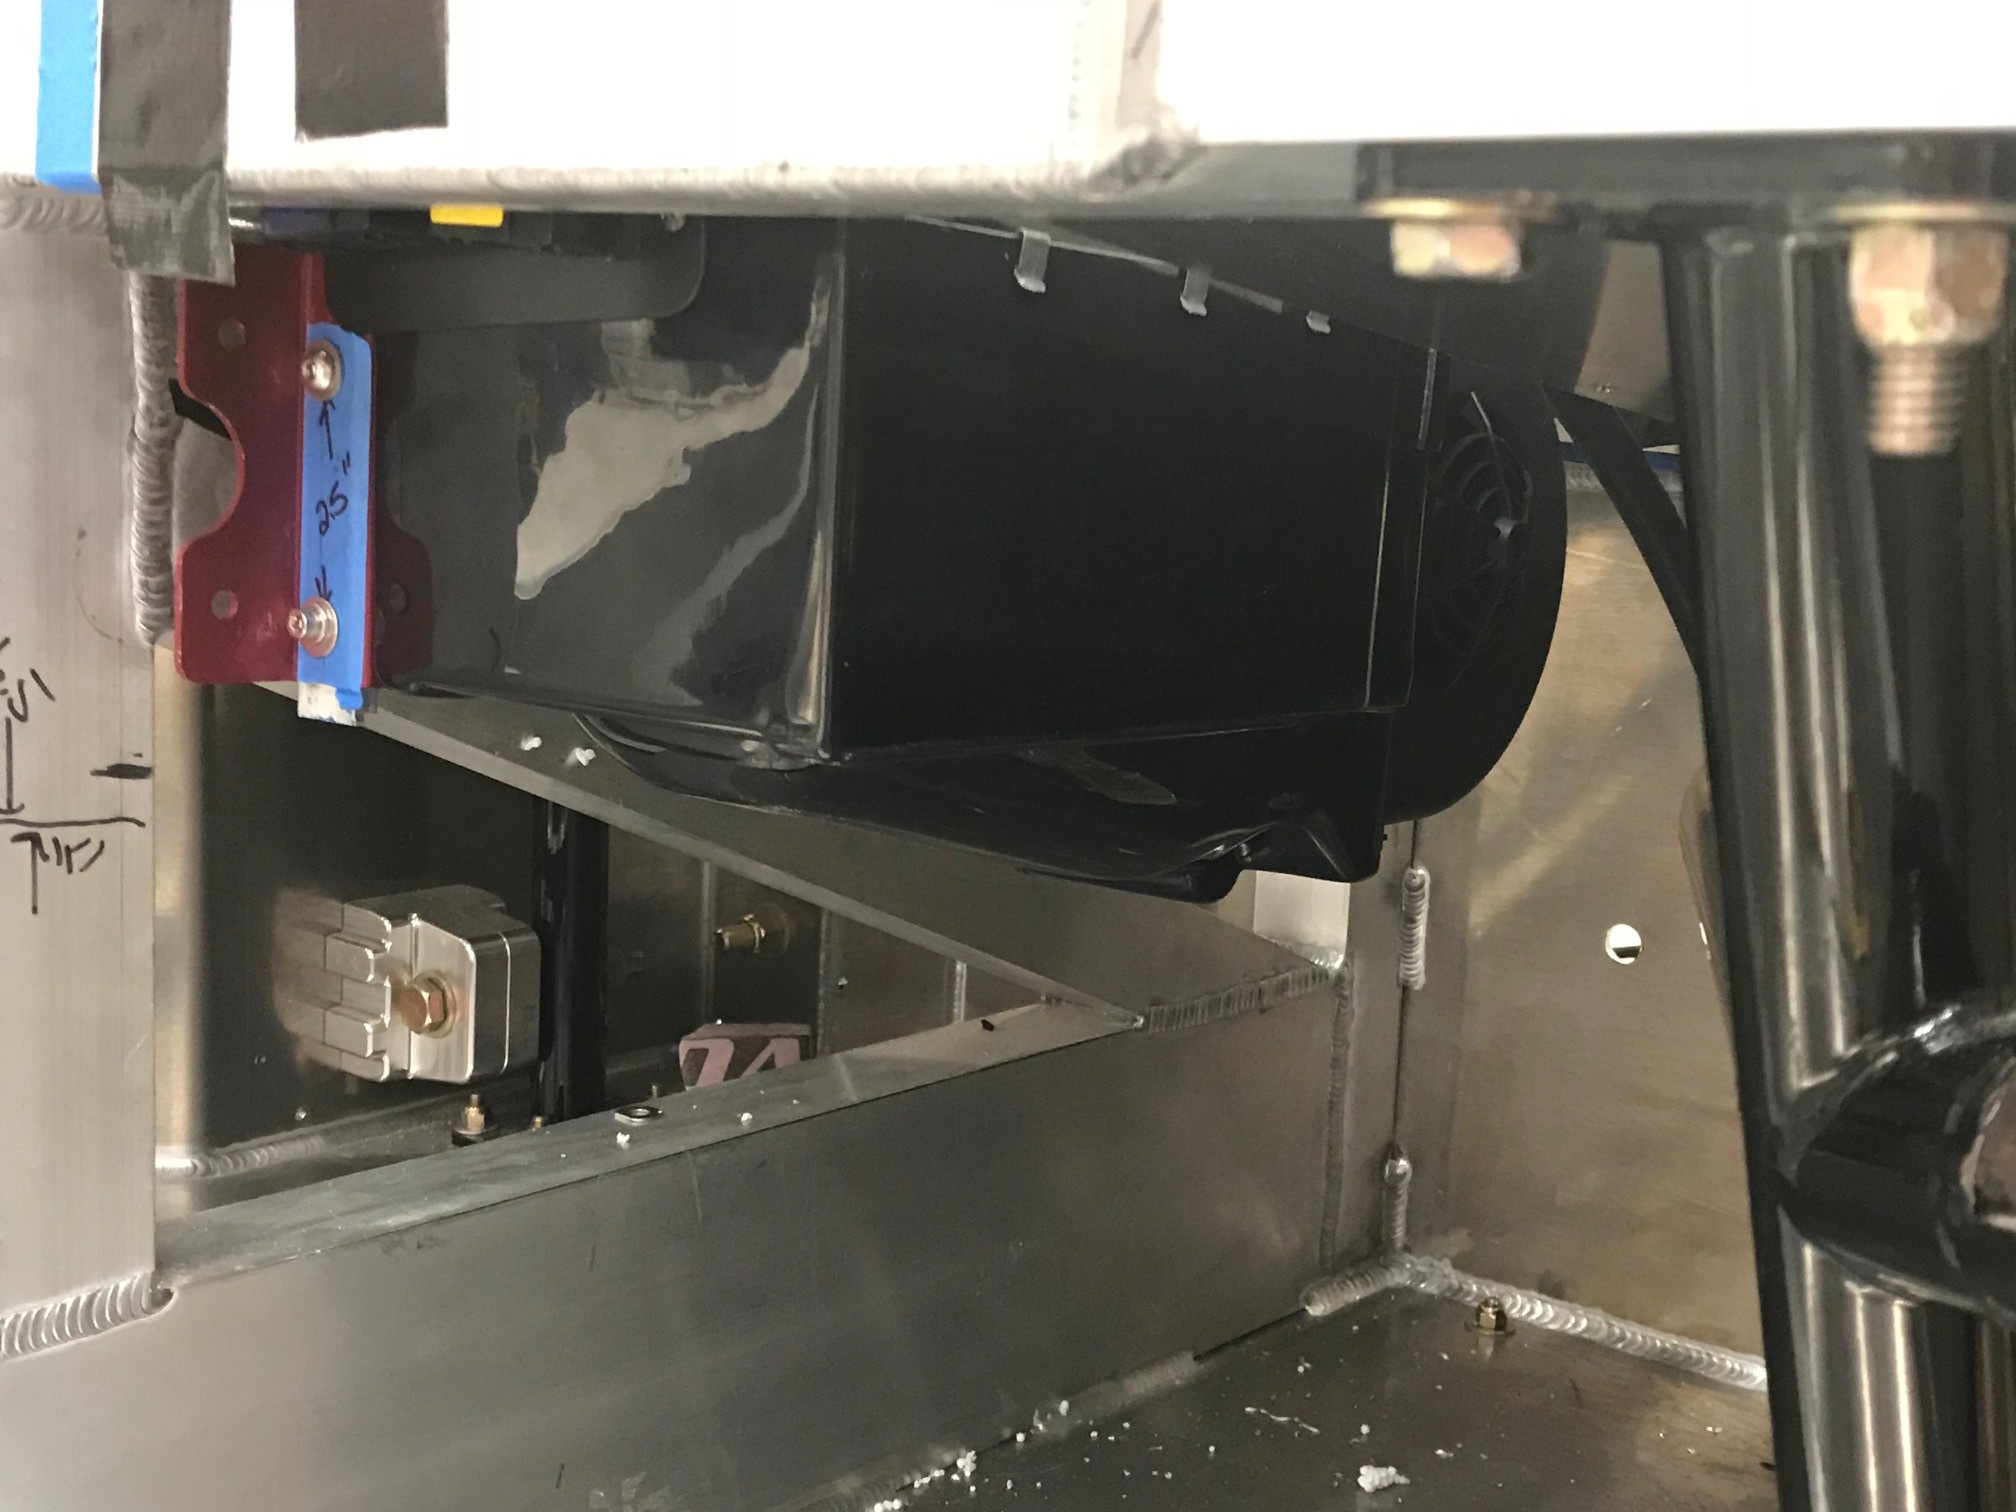
I finally got around to installing the A/C evaporator / heating coil unit. This is complicated because the side impact bars prevent the standard one from fitting. To fit the aftermarket one from Restomod Air I needed to man up and cut a big hole in the monocoque. I took some inspiration from this commercial...
Esmeralda had the kids, so my version involved cranking music to insane levels, playing Foosball beer (actually scotch) pong, tweaking the webbers on the cobra, welding and grinding some steel tubes to keep the car from rocking backwards off the lift and cooking some sous vide short ribs and finishing them off with scotch and blow torch. I did all of this while wearing only my boxers – yeah, not a pretty picture, but my man card was totally charged up.
The monocoque is 1/4" thick aluminum and Allan recommended that I use Bosch T227D jig saw blades. Eight teeth per inch (TPI) seems way too few for metal, but it's my understanding that the higher TPI blades easily become clogged. I used some cutting fluid and they cut it like butter... well, maybe frozen butter.
I got the Restomod Vapir III to fit, but it was going to a nightmare to get the hoses routed, so I went with a Restomod Bantam. According to Restomod Air even the smaller Bantam has more cooling and heating capacity than the largest Gen IV unit from Vintage Air. I'm not sure about that, but I think that it will certainly be better than the supplied Vintage Air Slimline unit.
I made some brackets out of right angle aluminum and mounted the unit (I'm not going to trim the brackets until I figure out the exact height of the dashboard). The net result is that the Bantam takes about as much vertical space as the Vintage Air does when it's mounted under the the foot box (i.e., no hole). That said, the Bantam extends further towards the front which leaves less room for your toes to point upward. Keep in mind that when you're sitting flat in the SL-C your toes take more vertical space than your legs!
The blue tape is covering the three dash and two defrost ducts. They point straight up so I will need to cut them off and design and 3D print a manifold to fit under the dash board. The heater dump points down between the two brackets so it will not need to be modified.
The bottom of the evaporater isn't flat. There is 12.5" vertical space between the bottom of the evaporator and the floor at the horizontal cross bar (i.e., directly in front of the passenger). That reduces down to 10" as you move forward. I think Allan measured one of his recent cars to have 10" of clearance. However, the Vintage Air unit doesn't extend nearly as far into the foot box so you have more toe room once you're seated.
The foot box slopes forward at about 7 degrees so the height of hoses from the foot box varies. The bottom of the right angle in the picture below is where I expect the bottom of the dashboard to be.The evaporator projects 3.25" above the footbox at the cross bar and about 5" at the point where it ends in the foot box. The plan is to have the 3D printed manifold directly under the dashboard. The hoses will attach to the manifold directly under the dash board but they will quickly slope down to the top of the foot box for mounting.
I also setup my Precision Mathews PM-25MV milling machine today. IMO it's the best entry-level, bench-top, Chinese mill. It has a variable, brushless 1 HP motor, a three axis DRO and an x-axis power feed. It should handle my needs. I managed to crack the chip shield bracket the first time that I used it. According to the manufacturer, 99.9% of the users remove it so I just 3D printed a replacement bracket to hold the switch and I tossed the rest in the trash.
The next step is to route the hoses.


