Cap on the left and CV joint on the right
I installed the reluctor rings for the traction control system on the CV joints. The first step was to remove the end caps which are held in place with a slight press fit and RTV (Room-Temperature-Vulcanization) silicone. It's my understanding that the silicone is used to prevent the grease from leaking out of the bolt holes. The end caps are made of thin metal, so I carefully tapped around the edge of the cap with a hammer and large, flat screwdriver. The first one took a while. The second one went much faster because I used a much larger hammer and bigger wacks ;-)
I then scrapped the silicone from the cap and the CV joint with a razor blade taking care not to let any pieces get into the grease. I was able to get almost all of the silicone off the the CV joint and then I used acetone and a metal finishing pad to get the remainder off. The cap was a different story. Apparently RTV silicone is pretty much impervious to acetone and most other solvents. After doing a little research, I bought some Permatex 80652 RTV Silicone Dissolver. It does soften thin layers of silicone, but it's a nightmare to work with because it has a jello-like consistency. It's almost impossible to get it to adhere where you want requiring you to use ten times more than you would think necessary... it was infuriating to use and I now fully understand some of the negative reviews on Amazon.
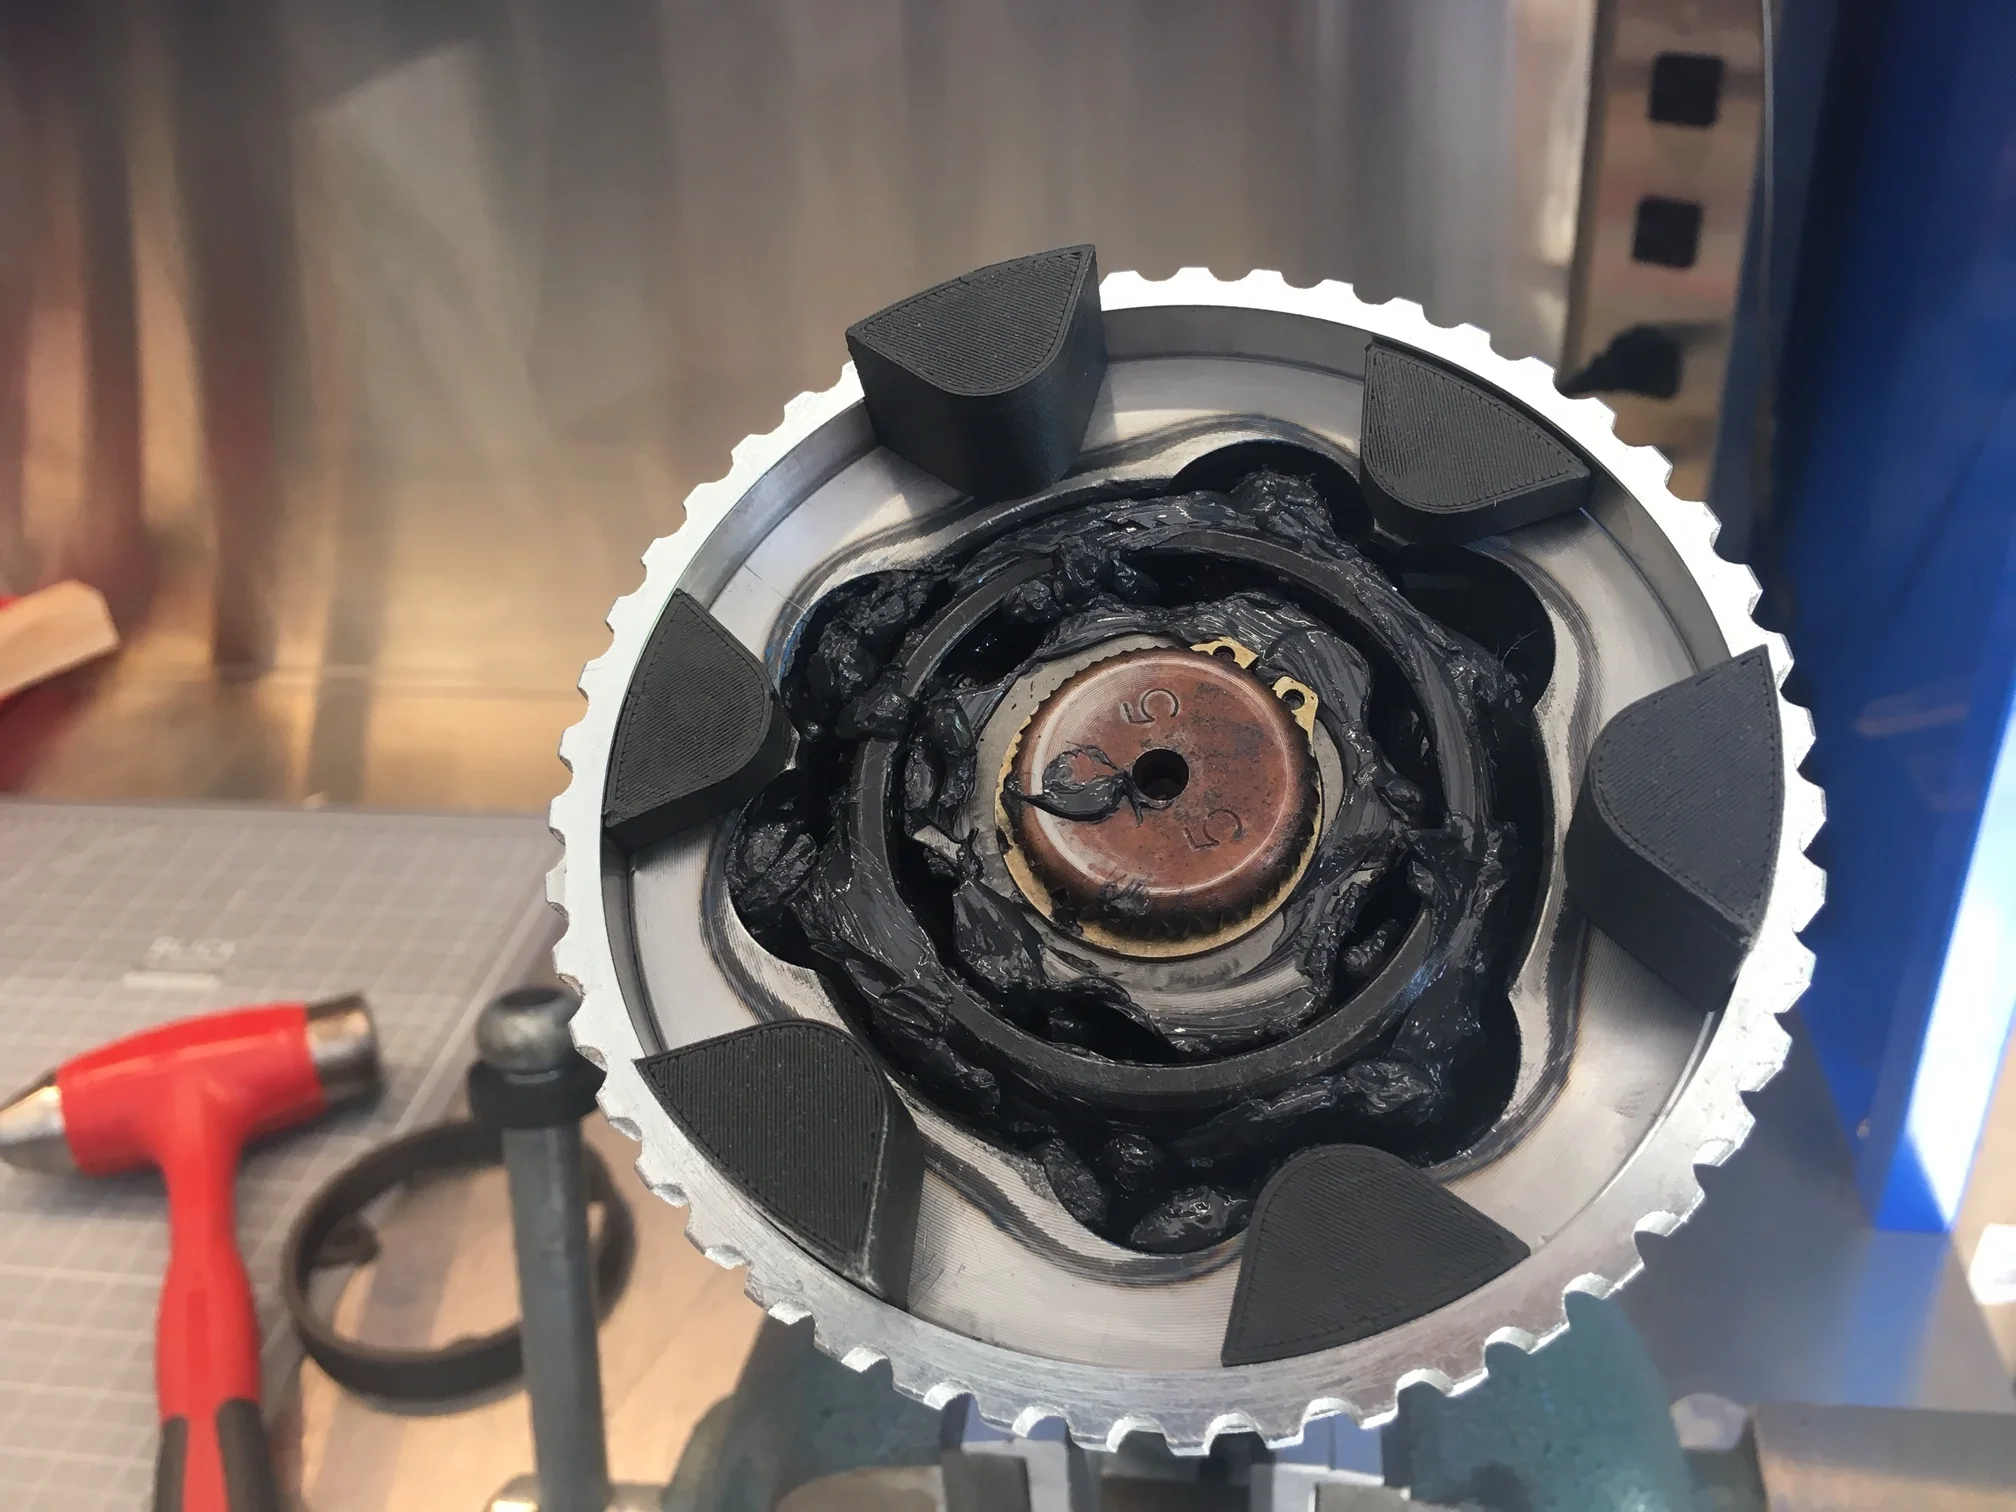
The next challenge was to mount the reluctors on the CVs. They use a friction fit and no matter what I tried I couldn't get them on. I could get one edge started, but the reluctor would be crooked and the only way to fix that was to remove it. The answer was to design and 3D print some tools. Specifically, six locating dowels (three short and three long) and a ring driver to apply even pressure on the reluctor when hammered. The only difference between the tall and short dowels is their height. Both hold the reluctor and ensure that it's concentric to the CV joint. The tall dowels also help hold the ring driver in place, but they restrict where you can hit the ring driver (unless I wanted to print a taller ring driver). The short dowels don't cause any interference and they require much less material to print.


The process worked as follows:
- Clamp the CV joint in a vice so that it is vertical (use soft jaws to prevent scratches).
- Insert the three short locating dowels in the CV joint so that they form an equilateral triangle.
- Insert the three tall location dowels in the remaining holes.
- Heat the reluctor to 300º F in an oven. This is hot enough to get it to expand, but not so hot as to damage the 3D-printed Onyx parts have a heat deflection temperature of 145º C (293º F) and I figured it would cool a little while being transferred from the kitchen to the garage... ahhh, I mean from my special car-part heater because I never use kitchen equipment for car stuff LOL
- Twist/tap the reluctor so that its top is flush with the top of the short locating dowels. This ensures that the bottom edge of reluctor is concentric to and just touching the CV joint.
- Slide the ring driver over the tall dowels taking care to align it so that the depth gauges won't collide with any of the dowels.
- Place a piece of square metal tubing on the ring driver and hammer on it until until all three depth gauges are seated on the CV joint. After every wack check to see if the reluctor is askew and wack the opposite side to straighten it if needed. I found that rocking the reluctor seemed to work better than trying to drive it straight down.
It worked like a champ!
The next step was to reinstall the caps. I used a hammer to carefully straighten the edge of the cap which had been somewhat misshaped when banging it off with the screwdriver. Once that was done, I applied Loctite 37461 Blue RTV Silicone Gasket Maker to the CV joints and gently tapped the caps on with a hammer. I immediately installed the axles so that silicone would be properly compressed before it dried. I decided to mount the reluctor next to the transaxle rather than the hub because the hub bounces up and down. I may need to change this when I route the exhaust, but that's easy to do later.

