Maintenance — Dampers
The dampers (aka shock asorbers) are semi-active unit from TracTive.
Front DAMPERS
| ID | Qty. | Description | Compound | Torque(FOOT-POUNDS) | TOOL |
|---|---|---|---|---|---|
| 1 | Penskee Shock | ||||
| 1 | Hydraulic Lift Cup | ||||
| 1 | Spring | ||||
| 1 | Spring Retainer |
Installation Process:
Remove the pin from the shock reservoir bracket.
Feed the shock reservoir up through the opening in the upper control arm
Lay the shock in place.
insert the reservoir into the bracket and reinstall the pin.
Place a cone washer on the left and right sides of the top monoball and slide the assembly into the upper shock bracket.
Insert the bolt and washer through, pointing towards the front of the car into the assembly.
Install the lower shock pin.
Rear Dampers
| ID | Qty. | Description | Compound | Torque(FOOT-POUNDS) | TOOL |
|---|---|---|---|---|---|
| A | 1 | Penske 8300 Series Rear Shock | - | - | - |
| B | 1 | 1/2” x 1-3/4” Shoulder Bolt, ??? thread | - | - | 1/4” Hex Bit Socket |
| C | 1 | ????? Washer | - | - | - |
| D | 2 | 1/2” ID x 1/4” Cone Washer (Aluminum) | - | - | - |
| E | 1 | ??? Washer (Grade 8) | - | - | - |
| F | 1 | ??? Nyloc (Grade 8) | - | - | - |
Installation
Mount rear shock to the billet piece
Loosen three hex screws (this makes it easier to slide the cone washers in)
Mount front of shock to rocker arm (0.25” cone washers)
Mount top of link to rocker
Tighten the three screws
Jack lower control arm
Mount lower shock pin to the lower control arm
Lower Shock Mounts
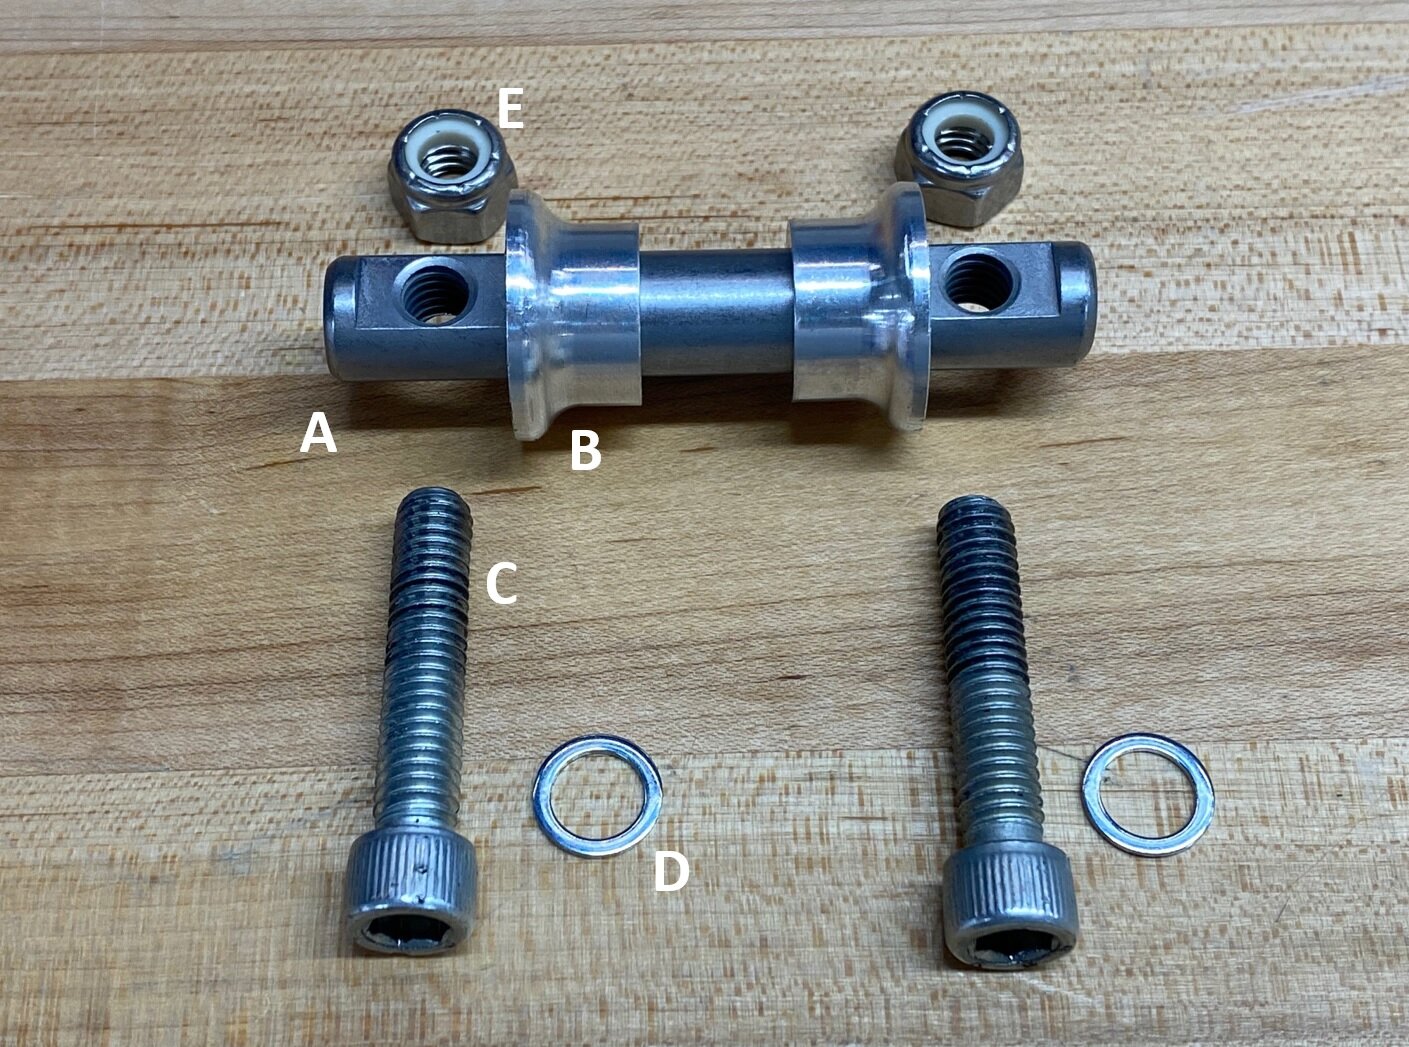
The lower shock mounts are the same for the front and rear. The only difference is that the front shock pins have been trimmed to enable them to be removed and installed without moving the sway bar brackets that mount to the front lower control arms. Note that they are handed.

| ID | Qty. | Description | Compound | Torque(FOOT-POUNDS) | TOOL |
|---|---|---|---|---|---|
| A | 1 | Shock Pin | n/a | - | - |
| B | 2 | 1/2" ID x 0.5" Cone Washer | n/a | - | - |
| C | 2 | 5/16"-18 x 1-1/2" Socket Head Cap Screw | n/a | ??? | 1/4" Hex Bit Socket |
| D | 2 | 5/16" Supertanium Socket Head Cap Washer | n/a | - | - |
| E | 2 | 5/16"-18 Nyloc | n/a | ??? | 1/2" Socket |
Note that C are special washers designed to fit in machined recesses for socket head cap screws and are not included in the kit.